Charting the Hackers

Published on Sunday, December 28, 2008

A normal internet connection gets attacked, a lot. The majority of attacks are of the form "hello, anybody there?" -- where most people just don't answer. But sometimes, just sometimes, the question gets an answer. Depending on the answer, the attacker will start to explore.

A few weeks back I was a little bored and started fiddling. I wanted to play with my Cisco, but also wanted to play with OSSEC, but also has a GIS craving. In the end I decided to create a map of the people who ask, "hello".

Take a look at the map and explanation if that sort of thing is your cup of tea.

Alexa Thumbnail Service

Published on

Amazon offers some pretty cool services: S3, EC2, Alexa Site Thumbnail, and others. A while back I wanted to use AST with Django, so ended up writing the Python bindings to the REST API (they didn't previously exist. I even wrote up a quick tutorial.

Update: Amazon no longer maintains AST. I've decided to archive a few of the old sites, so no longer need to take thumbnails. However, a few other thumbnail services seem to have crept up, including SnapCasa", and WebSnapr.

NetFlow into MySQL with flow-tools

Published on Sunday, December 21, 2008

I've been side-tracked on another little project, and keep coming back to NetFlow. For this project I'll need to access NetFlow data with Django, but this is a bit tricky. First, I'm sort of lazy when it comes to my own project; maybe not lazy, I just like taking the most direct route. The most up-to-date NetFlow collector I noticed was flow-tools, and there is even a switch to export the information into MySQL. Sweet! However, I wanted to insert the flows into MySQL automatically, or at least on a regular basis. I first started writing a python script that would do the job, but after a few minutes noticed flow-capture had a rotate_program switch, and started investigating. Since I somehow couldn't find anywhere instructions how to insert the data automatically, here's what I came up with:

1) Download flow-tools; make sure to configure with --with-mysql (and you'll have to make sure you have the needed libraries).

2) Create a new database, I called mine 'netflow'.

3) Create a table that can contain all the netflow fields, a sample is below. I added a "flow_id" field that I used as a primary key, but you don't necessarily need this.

CREATE TABLE `flows` (
`FLOW_ID` int(32) NOT NULL AUTO_INCREMENT,
`UNIX_SECS` int(32) unsigned NOT NULL default '0',
`UNIX_NSECS` int(32) unsigned NOT NULL default '0',
`SYSUPTIME` int(20) NOT NULL,
`EXADDR` varchar(16) NOT NULL,
`DPKTS` int(32) unsigned NOT NULL default '0',
`DOCTETS` int(32) unsigned NOT NULL default '0',
`FIRST` int(32) unsigned NOT NULL default '0',
`LAST` int(32) unsigned NOT NULL default '0',
`ENGINE_TYPE` int(10) NOT NULL,
`ENGINE_ID` int(15) NOT NULL,
`SRCADDR` varchar(16) NOT NULL default '0',
`DSTADDR` varchar(16) NOT NULL default '0',
`NEXTHOP` varchar(16) NOT NULL default '0',
`INPUT` int(16) unsigned NOT NULL default '0',
`OUTPUT` int(16) unsigned NOT NULL default '0',
`SRCPORT` int(16) unsigned NOT NULL default '0',
`DSTPORT` int(16) unsigned NOT NULL default '0',
`PROT` int(8) unsigned NOT NULL default '0',
`TOS` int(2) NOT NULL,
`TCP_FLAGS` int(8) unsigned NOT NULL default '0',
`SRC_MASK` int(8) unsigned NOT NULL default '0',
`DST_MASK` int(8) unsigned NOT NULL default '0',
`SRC_AS` int(16) unsigned NOT NULL default '0',
`DST_AS` int(16) unsigned NOT NULL default '0',
PRIMARY KEY (FLOW_ID)
) ENGINE=MyISAM DEFAULT CHARSET=utf8;


4) Setup your router so it sends netflow packets to your linux box (see README/INSTALL)

5) Create a "rotate program" that will actually enter in the information into mysql.

kelvin@monitor:/usr/bin$ cat flow-mysql-export 
#!/bin/bash

flow-export -f3 -u "username:password:localhost:3306:netflow:flows" < /flows/router/$1

6) Create the /flows/router directory

7) Start flow-capture (9801 is the port netflow traffic is being directed to); all done.

flow-capture -w /flows/router -E5G 0/0/9801 -R /usr/bin/flow-mysql-export

Zenoss Default Password

Published on Saturday, December 20, 2008

I've evaluated Zenoss before, but forgot the default password, and searching for it didn't come up with anything quickly. I tried everything under the sun: password, 1234, admin, God, Sex, but alas, grep to the rescue:

kelvin@monitor:/usr/local/zenoss/zenoss/etc$ grep admin *
hubpasswd:admin:zenoss


Update: it is listed on page 4 of the Admin PDF :)

Install ESX from a USB (no CDROM)

Published on Sunday, December 7, 2008

My little server doesn't have a cdrom, but I didn't want to actually run ESX from a USB (i.e. esx-on-a-stick). Here are my notes of configuring a flash disk to boot the ESX installer (so you can install it onto a local disk). For this demo, my USB is /dev/sdb


1) Install the syslinux utils to your computer (apt-get install syslinux mboot)

2) Install the MBR

sudo install-mbr /dev/sdb

3) Copy all the files from the ISO to your fat32 formated partition

4) Install syslinux

sudo syslinux /dev/sdb1

5) Move isolinux.cfg to syslinux.cfg, and try booting. If it doesn't work, edit syslinux.cfg says something like:

default menu.c32
menu title ESXi Boot
timeout 100

label ESXi
menu label Boot VMware ESXi
kernel mboot.c32
append vmkernel.gz --- binmod.tgz --- environ.tgz --- cim.tgz
ipappend 2

6) Unplug your USB, put it in your server, reboot, boot to USB-HDD (or select the USB disk), and install ESX to the local disk. You will likely be greeted with a sign saying "MBR FA:", where you need to press "A" and then "1".

OpenFiler Permission Issue

Published on

I've had issues before with OpenFiler where doesn't update the permissions, although they appear correct in the UI. To rectify that, I stumbled upon a one liner that fixed it. Let's say you have a group called "Trusted" that you want to have full access to your music folder. Here's the one-liner:

[root@files data]# pwd
/mnt/openfiler/data
root@files data]# setfacl --recursive -m u:nobody:rwx,g:Trusted:rwx music

Migrating large disks into ESXi

Published on

I recently had the need to move a rather large (450GB) VMDK file from an external hard drive into ESXi. Since ESXi doesn't support external hard drives, this makes things quite a bit more difficult. At first I tried using SCP to copy the file over (after enabling SSH access for ESXi). However, when I tried to do this the time left was almost 20 hours -- a tad too long!

I rethought my idea and decided to use this process:


1) Create an NFS share on my laptop, using the external hard drive (with the VMDK) as a mount point.

2) Use vmkfstools to move the image over.

3) Update any bugs I encountered.


Creating the NFS share on Linux is extermily easy. After install nfs via whatever package management tool you choose, put this entry into your /etc/exports file:


/media/disk-1 192.168.1.0/24(ro,no_root_squash,async)

This assumes your USB disk is mounted as /media/disk-1, and your local subnet is 192.168.1.0/24. In OpenFiler, add a new storage with type NFS and use your laptops IP as the hose, and /media/disk-1 as the mount point. For safey, tick read-only.

Next, unlock SSH if you haven't already. Once you are in, browse to /vmfs/volumes and you can see your nfs share and your other datastores. Let's say you USB virtual disk is located at /vmfs/volumes/nfs/bigdisk.vmdk, and you want to import it into your normal datastore, under a folder called 'NAS'. Using vmware specific tools, you can import the file as so:


# vmkfstools -i /vmfs/volumes/nfs/bigdisk.vmdk /vmfs/volumes/datastore1/NAS/bigdisk.vmdk

I needed to update the hardware version of my imported disk. To do this, open up the .vmdk file (you should also have a -flat.vmdk file), and update the virtualHWVersion entry from 7 to 4. With that, join your disk to an image, and you should be good to go.

An addition result I noticed was the speed at which it came over. By using SCP, the entire file was going to take 20hr. By using NFS and vmkfstools, the files was migrated in under 10 hours.


Speeding Up VMWare Server

Published on

I found VMWare Server to have very slow I/O, and sought to improve it. Below are a list of tests I performed, the change, and the results.


### Host OS ###
/dev/sdb1:
Timing buffered disk reads: 220 MB in 3.05 seconds = 72.17 MB/sec
kelvin@gorilla:~$ sudo hdparm -t /dev/sdb1

/dev/sdb1:
Timing buffered disk reads: 266 MB in 3.01 seconds = 88.33 MB/sec
kelvin@gorilla:~$ sudo hdparm -t /dev/sdb1

/dev/sdb1:
Timing buffered disk reads: 310 MB in 3.01 seconds = 102.99 MB/sec


### Before Changes ###

/dev/mapper/openfiler-data:
Timing buffered disk reads: 8 MB in 3.36 seconds = 2.38 MB/sec
[root@files etc]# hdparm -t /dev/mapper/openfiler-data

/dev/mapper/openfiler-data:
Timing buffered disk reads: 24 MB in 3.63 seconds = 6.61 MB/sec
[root@files etc]# hdparm -t /dev/mapper/openfiler-data

/dev/mapper/openfiler-data:
Timing buffered disk reads: 28 MB in 4.54 seconds = 6.16 MB/sec


I made several changes, but the changes that seemed to have the most impact are below:


vm.dirty_background_ratio = 5
vm.dirty_ratio = 10
vm.swappiness = 0


Pop this into the virtual machine's .vmx file, reboot, and off you go. One unfortunate side effect is that you can no longer overload the memory (e.g. allocate more memory with the VMs than you actually have available).


### After Changes ###

/dev/mapper/openfiler-data:
Timing buffered disk reads: 52 MB in 3.13 seconds = 16.61 MB/sec
[root@files ~]# hdparm -t /dev/mapper/openfiler-data

/dev/mapper/openfiler-data:
Timing buffered disk reads: 82 MB in 3.31 seconds = 24.75 MB/sec
[root@files ~]# hdparm -t /dev/mapper/openfiler-data

/dev/mapper/openfiler-data:
Timing buffered disk reads: 118 MB in 3.19 seconds = 36.97 MB/sec
[root@files ~]# hdparm -t /dev/mapper/openfiler-data

/dev/mapper/openfiler-data:
Timing buffered disk reads: 144 MB in 3.32 seconds = 43.37 MB/sec

[root@files ~]# hdparm -t /dev/mapper/openfiler-data

/dev/mapper/openfiler-data:
Timing buffered disk reads: 160 MB in 3.10 seconds = 51.57 MB/sec


UPDATE: Those wanting all the speed and still want to use memory overloading, I'd suggested you give ESXi a try. So far, so good.


## With ESXi, same hardware ##
[root@files ~]# hdparm -t /dev/mapper/openfiler-data

/dev/mapper/openfiler-data:
Timing buffered disk reads: 200 MB in 3.18 seconds = 62.92 MB/sec


Integrating OSSEC with Cisco IOS

Published on Saturday, November 15, 2008

I rank OSSEC as one of my favorite pieces of open source software, and finally decided to play around with it more in my own free time. (Yup, I do this sort of stuff for fun). My goal was quite simple: send syslog packets from my Cisco to my "proxy" server, running OSSEC. I found that, although OSSEC supports Cisco IOS logging, it didn't really work. In fact, I couldn't find any examples or articles of anybody actually getting it to work.

I initially tried to get it to work "correctly," and soon settled to "just getting it to work." I implemented some rules in the local_rules.xml file, which worked, but I'm pretty stubborn, and wanted to do it "correctly." With a couple pots of tea, and the support of my girlfriend, I became much, much more familiar with OSSEC. The key (and a lot of credit) goes to Jeremy Melanson for hinting at some of the updates to the decoder.xml file that need to take place.

The first step is to read the OSSEC + Cisco IOS wiki page. Everything on that page is pretty straight forward. I then added three explicit drop rules at the end of my Cisco's ACL:

...

access-list 101 deny tcp any host 220.244.xxx.xxx log
access-list 101 deny ip any host 220.244.xxx.xxx log
access-list 101 deny udp any host 220.244.xxx.xxx log


(220.244.xxx.xxx is my WAN IP, and I'm sure you could figure out xxx.xxx pretty darn easily, but I'll x them out anyways).

To reiterate, OSSEC needs to be told to listen for syslog traffic, which you should be set on the Cisco. If you haven't done this, go re-read the wiki above.


syslog
192.168.0.1


On or around line 1550 in /var/ossec/etc/decoder.xml I needed to update the regex that was used to detect the syslog stream.

...


^%\w+-\d-\w+: |^: %\w+-\d-\w+:


^%\w+-\d-\w+: |^: %\w+-\d-\w+: 


cisco-ios
firewall
^%SEC-6-IPACCESSLOGP: |^: %SEC-6-IPACCESSLOGP: 
^list \d+ (\w+) (\w+) 
(\S+)\((\d+)\) -> (\S+)\((\d+)\),
action, protocol, srcip, srcport, dstip, dstport


...


In the general OSSEC configuration file, re-order the list of rules. I had to do this because syslog_rules.xml includes a search for "denied", and that triggers an alarm.

...
telnetd_rules.xml
cisco-ios_rules.xml
syslog_rules.xml
arpwatch_rules.xml
...


Remember that these dropped events will go into /var/ossec/logs/firewall/firewall.log. Because this is my home connection, and I don't have any active_responses configured (yet!), I tightened the firewall_rules.xml file (lowering the frequency, raising the timeframe).

And in the end, I get a pretty email when somebody tries to port scan me.

Pretty email


OSSEC HIDS Notification.
2008 Nov 15 23:19:36

Received From: proxy->xxx.xxx.xxx.xxx
Rule: 4151 fired (level 10) -> "Multiple Firewall drop events from same source."
Portion of the log(s):

: %SEC-6-IPACCESSLOGP: list 101 denied tcp 4.79.142.206(36183) -> 220.244.xxx.xxx(244), 1 packet 
: %SEC-6-IPACCESSLOGP: list 101 denied tcp 4.79.142.206(36183) -> 220.244.xxx.xxx(253), 1 packet 
: %SEC-6-IPACCESSLOGP: list 101 denied tcp 4.79.142.206(36183) -> 220.244.xxx.xxx(243), 1 packet 
: %SEC-6-IPACCESSLOGP: list 101 denied tcp 4.79.142.206(36183) -> 220.244.xxx.xxx(254), 1 packet 


--END OF NOTIFICATION

Using Django with SQL Server and IIS

Published on Saturday, November 8, 2008

As you can tell from reading some of the other pages, I like Linux and open source. But I also like to answer the question "what if..." This post is my [brief] run down of answering "what if I could run Django on Server 2003 with SQL Server and IIS." Why, you may ask? To be honest with you, at this point, I don't really know. One of the deciding factors was seeing that the django-mssql project maintains support for inspectdb, which means I could take a stock 2003 server running SQL Server, inspect the DB, and build a web app on top of it. The Django docs offer a lengthy howto for using Django with IIS and SQL Server, but the website for PyISAPIe seems to have been down for the last month or so. Without further delay, below are my notes on installing Django with SQL Server and IIS.


1a) Install python-2.x.x.msi from python.org

1b) Consider adding C:\Python25\ to your Path (right click My Computer, Advanced, Environment Variables. Enter in blahblahblah;C:\Python25\)

2) Download a 1.0+ branch of Django (and 7-zip if you need it)

3a) Extract the contents of the Django. From inside Django-1.0, execute:

C:\Python25\python.exe setup.py install

3b) Consider adding C:\Python25\Script to your path.

4) Look in C:\Python25\Lib\site-packages -- confirm there is a Django package.

5) Checkout django-mssql (http://code.google.com/p/django-mssql/), copy sqlserver_ado from inside source to the site-packages directory

6) Download and install PyWin32 from sf.net

7) Start a test project in C:\Inetpub\ called 'test'

c:\Python25\scripts\django-admin.py startproject test

8a) Create a database using SQL Management Studio, create a user. (First, go to the Security dropdown. Right click Logins, add a new user. Next, right click Databases, New Database. Enter in the name, and change the owner to the user you just created).

8b) Edit the settings.py and add 'sqlserver_ado' and add database credentials. Use the below example if your database comes up in the Studio as COMPUTERNAME\SQLEXPRESS (you are using SQLExpress).

import os
DATABASE_ENGINE = 'sqlserver_ado'           # 'postgresql_psycopg2', 'postgresql', 'mysql', 'sqlite3' or 'oracle'.
DATABASE_NAME = 'crmtest'             # Or path to database file if using sqlite3.
DATABASE_USER = 'crmtest'             # Not used with sqlite3.
DATABASE_PASSWORD = 'password'         # Not used with sqlite3.
DATABASE_MSSQL_REGEX = True
DATABASE_HOST =  os.environ['COMPUTERNAME'] + r'\SQLEXPRESS' # I use SQLEXPRESS
DATABASE_PORT = ''             # Set to empty string for default. Not used with sqlite3.

9) Install/download FLUP: http://www.saddi.com/software/flup/dist/flup-1.0.1.tar.gz

python setup.py install

10a) Download pyisapi-scgi from http://code.google.com/p/pyisapi-scgi/

10b) Extract the files to somewhere you can remember on your computer, like, c:\scgi

11) Double click pyisapi_scgi.py

12a) Follow the directions here: http://code.google.com/p/pyisapi-scgi/wiki/howtoen -- I set a temporary different port since I'm just testing this out.

12b) The last few parts might be better served with an image or two:

Using an app pool to get the right permissions


(No resource/photo)


The SCGI configuration file


(No resource/photo)


Properties of the web site


(No resource/photo)
13) Start the scgi process from the Django folder directory

python manage.py runfcgi method=threaded protocol=scgi port=3033 host=127.0.0.1

14) Test your django page, http://192.168.12.34:8080


(No resource/photo)

Upgrading Cisco Wireless Firmware

Published on Monday, November 3, 2008

I'm always forgetting the exact string to enter at the CLI for updating the IOS on a wireless Cisco AP, so I'll just put it here to end my future searches:

Chimp# archive download-sw /force-reload /overwrite tftp://192.168.83.150/c1100-k9w7-tar.123-8.JEC1.tar


192.168.83.150 obviously being your tftp server, and the .tar file sitting in the root of the tftp server.

I suppose if you wanted to backup your IOS you could do something along the lines of:

Chimp# archive upload-sw tftp://192.168.83.150/someimage.tar

But I haven't tried it...

Configure Timevault to Remote Server

Published on Sunday, November 2, 2008

Using TimeVault with a shared drive as a backend is actually quite easy, but it does require a few special things setup. Note: this is gonna be a brief summary.


Install samba-tools, smbfs...


sudo apt-get install samba-tools smbfs

A lot more other stuff may install as well.


Create a script that mounts your samba share. You could also do this in fstab, but I tend to suspend my laptop when I come home, and I like clicking buttons.


#!/bin/bash

mount -t cifs //192.168.44.2/kelvin /mnt/backups -o netbiosname=KELVIN-PC,iocharset=utf8,credentials=/home/kelvin/Apps/.smb-details.txt


smb-details.txt includes:

username=DOMAIN\kelvin
password=mypassword


Finally, create a folder called 'timevault' or something inside your mapped share, then launch TimeVault and configure it to use the above mentioned /mnt/backups/timevault folder. Configure Timevault as normal.


Backup OpenFiler to S3

Published on

Backing up your Openfiler box to S3

While I don't think most pople would expect to backup their entire NAS/SAN to Amazon's S3, there might be a few very crucial things you need to backup. For instance, my girlfriend's PhD papers and data.

I've seen an implementation using Ruby and s3sync -- something that I do on my server -- but I'm trying to migrate everything to Python. Although there are a lot of great tools out there for S3, many of them Python-based, I wanted to do one thing and do it well: have one complete full backup available, and using as little bandwidth as possible. In these regards Duplicity would work well, except I wanted the ability to browse the S3 store using any other tool.

I've digged deeper into s3cmd, which I had noticed a long time ago, but I failed to notice it has a sync option. I have tested it out, and it appears to work very, very well. Here's how to use it with OF.

First, download s3cmd. You'll need to use subversion, so I first checked it out to my laptop, then uploaded it via SSH to OF. I put my s3cmd folder in /opt.


[root@files opt]# ls
openfiler s3cmd
[root@files opt]#


If you don't have elementtree installed, now is a good time to install it.


conary update elementtree:python


We need to next configure s3cmd with our AWS creds.


[root@files s3cmd]# ./s3cmd --configure


In the end I didn't configure encryption for my files (so just hit enter), but you may choose to do so. I have configured the transfer to use HTTPS, however.


Save settings? [y/N] y
Configuration saved to '/root/.s3cfg'


Cool. Now create a bucket on S3 for your NAS, e.g. blah2134accesskey.openfiler, using whatever method you choose (I typically use Cockpit). Now that you have a bucket, configure a *really* simple script to drop in cron:


#!/bin/bash

/opt/s3cmd/s3cmd sync /mnt/openfiler/data/profiles/bunny s3://blah2134accesskey.openfiler/mnt/openfiler/data/profiles/bunny
/opt/s3cmd/s3cmd sync /mnt/openfiler/data/profiles/kelvin-pc s3://blah2134accesskey.openfiler/mnt/openfiler/data/profiles/knicholson/kelvin-pc


Sweet! I like this approach quite a bit: I get file-level access to anything on the NAS, you don't have to actually install anything, and it 'just works.'

PyGTK + py2exe for Windows

Published on

I'm writing down these quick notes so I can remember the steps for getting py2exe to work with GTK.

  • Download the GTK+ runtime
  • Download py2exe
  • Copy over your project into the windows box
  • Create a setup.py file (see below)
  • Run "c:\Python25\python.exe setup.py py2exe"
  • Copy over the lib, etc, and share folder from C:\Program Files\GTK2-Runtime into the dist folder
  • Run app!

setup.py:

from distutils.core import setup
import py2exe

setup(
name = 'ploteq',
description = 'Bunnys Plotting Tool',
version = '1.0',

windows = [
{
'script': 'ploteq.py',
}
],

options = {
'py2exe': {
'packages':'encodings',
'includes': 'cairo, pango, pangocairo, atk, gobject', 
}
},

data_files=[
'ploteq.glade',
]
)

Slope Finder for the Missus

Published on

Since I do sysadminy stuff all day, I don't really get a chance to do much coding (or not as much of a chance as I would like). You can imagine my joy when my girlfriend expressed a problem she needed solved: "I'm going to need to solve 100s of slope equations, i.e. where two lines intersect. Can you write a program to do it?" Sure!

I asked if she wanted to do a batch input or just a one-off type of deal, she decided on the latter. Although I've done a fair bit of PyGTK stuff, I had never actually needed to convert it to Windows. I debated using IronPython -- but needed to use a special library to help solve the equations (I'm lazy).

So, where is the power in Python? After about 15-20m I had a console based app that could solve the slopes. I added the Linux GUI part in maybe 45m, and then the Windows part in, well, not 45m!

Either way, screenshot is below. Thanks girlfriend, I had fun!


Revised mod_tile Install HOWTO

Published on Saturday, November 1, 2008

This is the laundry list of things I did while creating a mod_tile VMware appliance based on Ubuntu Server 8.04. I've kept descriptions limited but left all the commands in. Let's start installing things...


Useful goodies for compiling source

sudo apt-get build-essential

More goodies for Mapnik + Friends

sudo apt-get install libboost-dev libboost-filesystem-dev libboost-filesystem1.34.1 libboost-iostreams-dev libboost-iostreams1.34.1 libboost-program-options-dev libboost-program-options1.34.1 libboost-python-dev libboost-python1.34.1 libboost-regex-dev libboost-regex1.34.1 libboost-serialization-dev libboost-serialization1.34.1 libboost-thread-dev libboost-thread1.34.1 libicu-dev libicu38 libstdc++5 libstdc++5-3.3-dev python2.5-dev

sudo aptitude install libfreetype6 libfreetype6-dev libjpeg62 libjpeg62-dev libltdl3 libltdl3-dev libpng12-0 libpng12-dev libtiff4 libtiff4-dev libtiffxx0c2 python-imaging python-imaging-dbg proj

sudo aptitude install libcairo2 libcairo2-dev python-cairo python-cairo-dev libcairomm-1.0-1 libcairomm-1.0-dev libglib2.0-0 libpixman-1-0 libpixman-1-dev libpthread-stubs0 libpthread-stubs0-dev ttf-dejavu ttf-dejavu-core ttf-dejavu-extra

sudo aptitude install libgdal-dev python2.5-gdal postgresql-8.3-postgis postgresql-8.3 postgresql-server-dev-8.3 postgresql-contrib-8.3

sudo aptitude install libxslt1.1 libxslt1-dev libxml2-dev libxml2 gdal-bin libgeos-dev libbz2-dev

sudo aptitude install apache2 apache2-threaded-dev apache2-mpm-prefork apache2-utils

sudo aptitude install subversion

This checks out the mapnik source:

svn co svn://svn.mapnik.org/trunk mapnik-src

Let's build mapnik with several specific locations included.

cd mapnik-src
python scons/scons.py PYTHON=/usr/bin/python PGSQL_INCLUDES=/usr/include/postgresql PGSQL_LIBS=/usr/lib/postgresql BOOST_INCLUDES=/usr/include/boost BOOST_LIBS=/usr/lib

sudo python scons/scons.py install PYTHON=/usr/bin/python PGSQL_INCLUDES=/usr/include/postgresql PGSQL_LIBS=/usr/lib/postgresql BOOST_INCLUDES=/usr/include/boost BOOST_LIBS=/usr/lib

And prepare a few things for the mapnik rendering...

svn co http://svn.openstreetmap.org/applications/rendering/mapnik/

cd ~/mapnik
wget http://tile.openstreetmap.org/world_boundaries-spherical.tgz 
tar -xpjf world_boundaries-spherical.tgz
unzip processed_p.zip 
cp coastlines/* world_boundaries/ 
rmdir coastlines 

Time to setup postgres. I have the intentions of running renderd (the mod_tile rendering engine) under whatever user Apache is running as, so I'll setup postgres to allow the OSM user to authenticate via password. I'm not a postgres expert, so if you see me doing something totally foolish, let me know.


sudo vi /etc/postgresql/8.3/main/pg_hba.conf

And edit the authentication part as so:

# Database administrative login by UNIX sockets
local   all         postgres                          ident sameuser
local   all         osm                               password sameuser

And now to actually configure postgres for the OSM data

sudo su postgres
createuser osm
createdb -E UTF8 -O osm gis
createlang plpgsql gis
psql -d gis -f /usr/share/postgresql-8.3-postgis/lwpostgis.sql
echo "ALTER TABLE geometry_columns OWNER TO osm; ALTER TABLE spatial_ref_sys OWNER TO osm;"  | psql -d gis
echo "alter user osm with password 'columbia';" | psql

sudo /etc/init.d/postgresql-8.3 restart

Now, let's render a sample image. Edit set-mapnik-env by changing the DB to 'gis', the username to 'osm', and the password to 'columbia'

cd mapnik
source ./set-mapnik-env
./customize-mapnik-map >osm.xml
./generate_image.py

If you get an error about it not finding a lib, make sure to do a...

sudo ldconfig

You should have an image called 'image.png' in the mapnik directory, and it should look distinctly like the UK.


svn co http://svn.openstreetmap.org/applications/utils/export/osm2pgsql
cd osm2pgsql
make

Ok, that was easy. Let's load some data. I've used a sample snippit from Sydney in /home/osm to illustrate this.

./osm2pgsql -W -d gis ../sydney.osm

Type in the password used for postgres ('columbia')


I'll now check that the data is accessible by editing generate_image.py with the correct coords for Sydney.


ll = (150.29, -34.04, 151.25, -33.36)

Time to get mod_tile up and running.


sudo apt-get install libagg-dev

svn co http://svn.openstreetmap.org/applications/utils/mod_tile
cd mod_tile

Depending on the revision of mod_tile you are using, you are going to have to edit the source before compiling. The two files you need to read through are the Makefile and render_config.h. I change the apxs and apachectl locations to the correct place (lines 2, 13 and 14). Since I did it on a x86 image, I took out any references to lib54 (line 33). In render_config.h, I made the following changes:


Line 8


#define WWW_ROOT "/var/www"

Line 23


#define OSM_XML "/home/osm/mapnik/osm.xml"

Removed references to lib64 on lines 26 and 29.


make && make install

Set it up as a module for apache by creating a file in /etc/apache/conf.d called 'mod_tile' and putting in there:


LoadModule tile_module /usr/lib/apache2/modules/mod_tile.so

Created a folder called 'osm_tiles2' and 'direct' in /var/www, and make sure they are writable by whatever apache runs as (likely www-data). Restart apache.

From here, I created a file that automatically zooms in on the map I just created -- you can check it out here. Start the renderd process as www-data, and browse to the sample file.

cd ~/mod_tile
sudo su www-data
./renderd

By now you should have a working mod_tile/OSM setup. After a change and tune a few things on the Ubuntu image I'll make the VMware image available for download. I can't wait to do some OSM projects!


Capped Internet

Published on

I've lived in several different parts of the world, and they all do internet differently. Back in the US I had 8Mb/sec cable (leaving just before Fios was really an option, darn!) In New Zealand, for instance, I was paying for "high speed ADSL" rated at 1.5Mb/256k. Vrooom. Up in Taiwan I was paying 1/2 what I paid in New Zealand, but for 12Mb/1Mb. Down to Sydney and we have a rated 24Mb/1Mb.

But there's a catch with the plans in New Zealand and Australia: they are 'capped'. This means you only get XGB/month -- and it isn't like Comcast capping at 250GB/month, I'm talking about 1GB/5GB/10GB and so forth. And there's more -- just like mobile phones, you get on-peak and off-peak times.

This all does make a bit of sense to me -- there are only X amount of tubes going in and out of NZ and AU, and I would imagine they get pretty clogged.

Either way, last month was pretty painful. Two weeks into our plan I checked out usage: 14GB of 18GB! We had only 4GB left to use for 15 days. This sounds like a lot, but for the two of us, and my 10 virtual servers, it isn't. The first thing I did was looking at a way to do WSUS with Linux -- I ended up using apt-cacher (I'm using only Ubuntu at home). BitTorrent, out; downloading any new ISOs, out; streaming music, totally out. For a while I has to VPN to home, and then VPN to a client, as our router at work didn't seem to like letting us access one of our clients. I even disconnected from the VPN if I wouldn't be doing work for 20m!

We eventually made it, and used only 2GB in two weeks. What an accomplishment!

Using Raw Disks with VMware Server 2

Published on Monday, August 11, 2008

For various reasons I had the need to open a raw disk inside VMware Server 2. The reports from the field say that this just isn't supported. Although I don't need to actually run a raw disk, I needed to get some data off it -- 400GB worth. It turns out 'not supported' really means 'not in the UI.' I don't know the reason why it isn't in the UI, maybe marketing wants people to use ESX, or maybe the UI guys fell behind with their workload.

Alas, it is possible. And here's how.


1) Take out your 'raw disk' and put it into another machine.

2) Fire up Server 1.0.x or Workstation and open a virtual machine (or create a new one). Edit the preferences and add a new hard disk. Select 'use a physical disk', and select the disk you put in above. Select use entire disk. You may want to change the SCSI LUN to SCSI1:0 (depending how many disks are in your 'proper' server).

3) Save it as something like 500GB.vmdk

5) Copy out the relevant bit from the vmx file, e.g.

# Test VM.vmx
scsi1.present = "TRUE"
scsi1:0.present = "TRUE"
scsi1:0.fileName = "500GB.vmdk"
scsi1:0.deviceType = "rawDisk"


And of course, the entire 500GB.vmdk file

# 500GB.vmdk
# Disk DescriptorFile
version=1
CID=7e245252
parentCID=ffffffff
createType="fullDevice"

# Extent description
RW 976773168 FLAT "/dev/sdb" 0

# The Disk Data Base 
#DDB

ddb.virtualHWVersion = "6"
ddb.geometry.cylinders = "60801"
ddb.geometry.heads = "255"
ddb.geometry.sectors = "63"
ddb.geometry.biosCylinders = "60801"
ddb.geometry.biosHeads = "255"
ddb.geometry.biosSectors = "63"
ddb.adapterType = "buslogic"

Note: If your guest OS is 64-bit, you won't be able to use buslogic. Switch the last entry above to 'lsilogic'.

While you could likely create the vmdk file by hand, the only number I'm not certain about is the part after the RW. (UPDATE: Note added to page). The Disk Data Base you can just see by typing in 'fdisk /dev/sdb'


4) Move the disk back to the 'server' and turn the server back on.

5) Edit the vmx file of whatever virtual machine you want to use and put in the part copied from the vmx file of your other machine. Alternatively, if you did an upgrade, you could just copy it across now. Create a new 500GB.vmdk file in the same directory, paste in the bit you copied out from the test virtual machine. Double check that the 'raw disk' comes up as the same node in /dev.

6) Boot up the virtual machine. You will notice in the WebUI that a new scsi controller is inserted. You should also noticed a new disk accessible inside your virtual machine, e.g.

[root@files dev]# ls sd*
sda  sda1  sda2  sda3  sdb  sdb1
[root@files dev]# ls /mnt
cdrom  floppy
[root@files dev]# mkdir /mnt/disk
[root@files dev]# mount /dev/sdb1 /mnt/disk
[root@files dev]# ls /mnt/disk
Files  lost+found  Movies  Music  Personal  VMWare
[root@files dev]#


Update: Peter Jonsson kindly sent in the answer to "I don't know what to put after the RW." Below is the description of how to find the correct number. Thanks Peter!

The magic formula is:

ThePartAfterTheRW  =  TOTAL AMMOUNT OF DISKBYTES   /   512


This is my Western Digital 500 GB drive: 

fdisk -l

Disk /dev/sdc: 500.1 GB, 500107862016 bytes

256 heads, 63 sectors/track, 60563 cylinders

Units = cylinders of 16128 * 512 = 8257536 bytes

Disk identifier: 0x00000000

And using the formula I got the "RW" stuff:

500107862016 / 512  = 976773168

VM Automatic Startup in Server 2

Published on Saturday, August 2, 2008

I think possibly one of the most practical upgrades in VMware Server 2 appears to be the ability to automatically turn on virtual machines in a stagnated order. I have fond memories of turning on a server with 10 virtual machines, and when they all turn on at once, the hard disk grinds to a halt. This forced me to turn on the machines manually afterwards.

+1 VMware in my books.


VMware Tools in VMware Server 2

Published on Friday, August 1, 2008

Installing the tools in VMware Server 2 is a little different than Workstation or the previous versions of VMware Server. Under the Summary tab of your Virtual Machine, look for a link that says "Install VMware Tools" -- click it.

Wait for 'Success' to show up on the bottom, and jump into your virtual machine. Mount the tools as so:

mount /dev/cdrom /media/cdrom


And install as normal (copy the .tar.gz to /usr/src, extract it, install it). Easy peasy.

Ubuntu 8.04 64-Bit and VMware Server 2

Published on

I now have successful installation of VMware Server 2 (Beta RC1) on top of Ubuntu 8.04 64-bit. I have been using various virtualization technologies for years, and VMware is usually the easiest to install and configure. So far, VMware Server 2 RC1, has proven to be the exception to the rule.

That said, I am very excited by the direction VMware is taking -- this new server version looks to have great potential.


The 'server' this is on is a mATX motherboard from Gigabyte (GA-G33M-DS2R), with 4GB (2x2GB) of Transcend DDR2-800 memory, topped off with the E8200. I have been nothing but impressed with this combination of hardware.

However, although I was thinking VMware Server 2 would install seamlessly over Ubuntu, I was wrong. There were a few things I had to tweak to get everything working correctly.

The first thing I had major issues with was VMware choking on the parallel port. Normally the parport is the first thing I would turn off, but in this instance, I guess excitement overtook me. My tip is to first remove the lp module from inside /etc/modules, and then disable the parallel port inside the BIOS. The symptoms I was having involved VMware halting/freezing on either startup or shutdown. This occurred for both RC1 as well as 1.0.6.

My second tip, if VMware freezes half way through starting up or shutting down, is to go through the vmware startup script, /etc/init.d/vmware, and comment out anything refering to the parport_pc. In particular, I looked for this line and made sure to comment it out:

/sbin/modprobe -r parport_pc >/dev/null 2>&1


I commented out lines 974 and 1076. After doing this, VMware loaded perfectly.

The second major issue I had occurred after actually installing VMware. I opened Firefox and went to the IP of my virtual server, logged in just fine, and loaded up my first virtual machine. However, after booting the virtual machine, I was unable to open up the remote console. It turns out I had just upgraded to Firefox 3.0.1, and the Remote Console is set to fail on anything above 3.0.0.1. The fix is quite easy.

First click where it says "click anywhere to open the virtual machine". Copy the address of the XPI and use something like wget to download the file. This is an example:

wget --no-check-certificate https://192.168.50.10/ui/plugin/vmware-vmrc-linux-x86.xpi


If you are using Gnome, right click the file you just downloaded and say Open With then Archive Manager. Do the same for the 'install.rdf' file inside, specifying gedit as the application if need be. Next, edit line 20 so it reads as follows:

3.0.*


Save the file, open the XPI with Firefox, and you should be good to go.

I've seen a lot of other suggestions on the 'net on how to fix VMware RC1 when booting -- including disabling ipv6, checking the hosts file, and running the any-any patches. None of these approaches helped me at all, but maybe it is exactly what you need. My biggest tip is that if VMware isn't starting up or stopping correctly, open up /etc/init.d/vmware and find out exactly where it is faulting (add things like 'echo "fail"' inside the IF statements).

GUI to Plot Driving Speed

Published on Tuesday, May 27, 2008

I needed another Python fix, and I need one pretty badly. I spent the weekend wondering why it appears to be impossible to edit the GUIDs inside an Exchange mailbox store (read: NOT the GUIDs stored in AD for Exchange). Anyways, I digress.

My goals were simple. I wanted to use Python, wanted something to do with traffic, and wanted to play around with Glade/PyGTK and graphing stuff. My end result was a little app that allows you to specify a GPX file, and it plots the waypoints (and calculates the moving average!). Pretty simple, pretty useless, but pretty fun. I really do like pretty pictures.


I ended up using matplotlab for the graphing part, but I don't really like how the graphs look. I will likely use Pycha (which dips into Cairo) for my future projects -- but we'll see when that point comes. (If data sensitivity wasn't an issue, I would totally use Google Charts, since I'm a sucker for APIs).

Setting up Windows 2003 as an NTP Client

Published on Tuesday, April 29, 2008

I have had to search for the commands to setup a Windows 2003 box as an ntp client a few times now, so have decided to finally write them down here for my own good measure. Funny thing is, I'm pretty sure there are three ways to setup a 2003 box as an ntp client.

1) Via the CLI


Open up the cmd prompt and type in:

w32tm /config /manualpeerlist:"0.pool.ntp.org 1.pool.ntp.org 2.pool.ntp.org 3.pool.ntp.org" 
/syncfromflags:MANUAL /reliable:YES /update


2) Via the CLI, option 2


net time setsntp: "0.pool.ntp.org 1.pool.ntp.org 2.pool.ntp.org 3.pool.ntp.org"


3) Via GUI


Type in gpedit.msc and your local GPO editor will pop up. Go to the folder as indicated in the below screenshot and Enable the "Enable Windows NTP Client" option. Next set the "Configure Windows NTP Client" option to whatever time servers you so choose. As always, make sure to keep the 0x1 at the end.

Event vs. DOM Driven Parsing of XML

Published on

I recently have been playing with parsing GPX files and spitting out the results into a special KML file. I initially wrote a parser using minidom, yet after running this the first time -- and my Core2Duo laptop reaching 100% utilization for 10 seconds -- I realized I needed to re-write it using something else.

I spent a little time reading the different parsers for XML and eventually read more about cElementTree. And it is included with Python2.5, sweet.

I quickly rewrote the code and did some tests. First, the two bits of code for parsing my GPX file:

minidom-speed.py

#!/usr/bin/python

from xml.dom import minidom
from genshi.template import TemplateLoader

def collect_info():
dom = minidom.parse('airport.gpx')
for node in dom.getElementsByTagName('trkpt'):
lat = node.getAttribute('lat')
lon = node.getAttribute('lon')
speed = node.getElementsByTagName('speed')[0].firstChild.data
speed = float(speed) * 10
coords = '%s,%s' % (lon, lat)
coords_speed = '%s,%s' % (coords, speed)
yield {
'coordinates': coords_speed
}

loader = TemplateLoader(['.'])
template = loader.load('template-speed.kml')
stream = template.generate(collection=collect_info())

f = open('minidom.kml', 'w')
f.write(stream.render())


cet-speed.py

#!/usr/bin/python

import sys,os
import xml.etree.cElementTree as ET
import string
from genshi.template import TemplateLoader

def collect_info():
mainNS=string.Template("{http://www.topografix.com/GPX/1/0}$tag")

wptTag=mainNS.substitute(tag="trkpt")
nameTag=mainNS.substitute(tag="speed")

et=ET.parse(open("airport.gpx"))
for wpt in et.findall("//"+wptTag):
wptinfo=[]
wptinfo.append(wpt.get("lon"))
wptinfo.append(wpt.get("lat"))
wptinfo.append(str(float(wpt.findtext(nameTag)) * 10))
coords_speed = ",".join(wptinfo)
yield {
'coordinates': coords_speed,
}

loader = TemplateLoader(['.'])
template = loader.load('template-speed.kml')
stream = template.generate(collection=collect_info())

f = open('cet.kml', 'w')
f.write(stream.render())


The speed difference is not just noticeable, but very noticeable.

minidom-speed.py

$ python -m cProfile minidom-speed.py
4405376 function calls (3787047 primitive calls) in 32.142 CPU seconds


cet-speed.py

$ python -m cProfile cet-speed.py
1082061 function calls (904167 primitive calls) in 6.736 CPU seconds


A quarter as many calls and almost 5x faster -- at least that's how I interpret the results. Much better!

Another Baby Step

Published on

I showed a few of my co-workers my graph and one replied -- oh! that's really cool. (I think only two of my co-workers are actually interested in my geekyness). He then emailed me tonight a .kmz file containing a colorized file of his speed. I looked at the kml and noticed it appeared to be dynamically allocated judging by the top speed. Well, as you could guess, I surely had to modify my code to include colors.

Within an hour I had a semi-working example, and within two hours will easily be done with this blog post. The code might not be perfect, but it first parses the xml and returns the max speed for the trip. Next, it colorizes the speeds based on a scale of 0-255, with 0 being blue for fast and 255 for being yellow, or slow. I was going to study for the CCNA tonight, but it looks like writing Python is just too much fun.


So what, you might ask, are those dips? Good question. They are huge speed bumps (and the tall blue mound in the middle is a really steep hill).


Baby Steps at Graphing Traffic

Published on Sunday, April 27, 2008

Status:
You can likely tell that I've been having some fun with graphing and mapping recently. I was reading a few articles about GIS and stumbled upon a pretty darn cool project at Webopticon, which included cool pictures. I showed it to my girlfriend thinking she would find it interesting, and then realized: oh! KML has an altitude attribute. That could be interesting.
One of my projects is to create maps of Sydney's traffic, so I have been experimenting heavily with Mapnik and OSM. I figured I could have some fun and finally parse some gps tracks and display the data.


I first started off trying to play around with the KML files my gps logger natively stores. After a while I realized it shouldn't be this hard to parse the XML, and realized it also stores data in gpx format. I opened up one of the gpx files and immediately saw how much easier it would be to work with. I quickly created a parser for the xml in Python (using the dom method, yet I think I'm going to rewrite it using sax), and then with the aid of an article by Sean Gillies, converted the needed objects into KML. I used the speed attribute (with some magnification) as the altitude, and voila, a pretty picture.
This picture is as Victoria Road crosses James Rouse Drive -- a spot that is always congested in the morning.
I'll likely post some code shortly, I would like to rewrite the parsing section to use something event-driven -- hopefully it will be a little faster.

Setting up a Mapnik Server on Ubuntu

Published on

First, we go ahead and install the needed packages. I've tried to include "my" list of packages that were needed to get a vanilla 7.10 image up to steam.

apt-get install build-essential libltdl3-dev autoconf libtool automake \
postgresql postgresql-8.2-postgis postgresql-server-dev-8.2 \
wget subversion libboost-python1.34.1 libboost-thread-dev \
libboost-program-options-dev libboost-regex-dev \
libboost-python-dev libboost-serialization-dev \
libboost-filesystem-dev libpng12-dev libjpeg62-dev \
libtiff4-dev zlib1g-dev libfreetype6-dev libgeos-dev \
unzip apache2-prefork-dev


Next we start to download a few components. I did this in my home directory, /home/kelvin

mod_tile - this is the apache module and rendering daemon that uses mapnik to render the maps.

svn co http://svn.openstreetmap.org/applications/utils/mod_tile

Mapnik - this will help us create the maps.

wget http://download.berlios.de/mapnik/mapnik_src-0.5.1.tar.gz


Now we start to install things.

tar -xpzf mapnik_src-0.5.1.tar.gz
cd mapnik-0.5.1


Build mapnik as per: http://wiki.openstreetmap.org/index.php/Mapnik -- make sure to use scons as follows:

python scons/scons.py PYTHON=/usr/bin/python \
PGSQL_INCLUDES=/usr/include/postgresql \
PGSQL_LIBS=/usr/lib/postgresql BOOST_INCLUDES=/usr/include/boost BOOST_LIBS=/usr/lib


Now, I'm temporarily serving/rendering my tiles from an old Thinkpad "server" (PIII with 512MB RAM, of which only 128MB goes to the Xen instance that hosts all of this). So, I am using osm2pgsql on my laptop (a new Thinkpad), and pushing it into the postgres database on my "server". So, I built osm2pgsql on my new Thinkpad, and setup postgres on the "server" to accept connections from my new Thinkpad.

pg_hba.conf -- Set these lines should be added, assuming your computer is 192.168.10.100:

host    all     all     192.168.10.100/32  trust

Then I do the actual import, assuming my "server" has an IP of 192.168.10.10:

./osm2pgsql -H 192.168.10.10 -U username -l -m -d gis -W /home/location/to/osm/australia.osm


Make sure generate_image works before installing mod_tile!

Install mod_tile as per the modifications needed: http://www.kelvinism.com/howtos/notes-installing-mod_tile-mapnik/

And the end result? http://tiles.kelvinism.com (remember, on a seven year old Thinkpad!)

Redirecting Fun with Lightty

Published on Wednesday, April 23, 2008

Two of my colleagues were having just a little bit too much fun with my blog, so I decided to have some fun back. Over a period of 10 minutes, they managed to leave 10+ comments. Luckily I have full control over my server, and was able to quickly create my practical joke.

$HTTP["remoteip"] == "123.45.678.910" {
url.redirect = (
"^/(.*)" => "http://www.urbandictionary.com/define.php?term=annoying+fuck",
"" => "http://www.urbandictionary.com/define.php?term=annoying+fuck",
"/" => "http://www.urbandictionary.com/define.php?term=annoying+fuck"
)
}

Notes on Installing mod_tile for Mapnik

Published on Tuesday, April 22, 2008

I have no idea if these notes on how to install mod_tile will be useful for anybody. The current readme states that you need to edit the source code, but never actually where. Well, this is where, at least until the code can either take switches or can auto-configure itself. This is quite brief, so if you need more details, shoot me an email or leave a comment. I have repeated this process on two Ubuntu 7.10 machines.

1) Install mapnik as per normal -- you may also need to do a...

$ ./bootstrap
$ ./autogen.sh
$ ./configure
$ make
# make install


2) Install libagg (apt-get install libagg-dev)

3) Make sure the mapnik library files are /usr/local/lib (libmapnik.*)

4) Make sure to copy/install fonts and input folders into /usr/local/lib/mapnik

5) Edit Makefile, change line 27 to where your include files are located

RENDER_CPPFLAGS += -I/usr/local/include/mapnik


6) Edit Makefile, change line 33 to where your mapnik libraries are (libmapnik.*)

RENDER_LDFLAGS += -lmapnik -L/usr/local/lib


7) Edit Line 40 of gen_tile.cpp to point to your osm.xml file (that you can verify works with generate_image.py)

static const char *mapfile = "/home/kelvin/mapnik-osm/osm.xml";


8) Edit line 219 of gen_tile.cpp to point to the correct location of the datasource input.

datasource_cache::instance()->register_datasources("/usr/local/lib/mapnik/input");


9) Edit line 221 of gen_tile.cpp to point to the correct location of your fonts directory.

load_fonts("/usr/local/lib/mapnik/fonts", 0);

10) The module will install in /usr/lib/apache2/modules, so mod_tile.conf should read:

LoadModule tile_module /usr/lib/apache2/modules/mod_tile.so

Final note: I think it would be possible to just symlink the lib directory to lib64, although I would expect that could have some undesirable outcomes down the road. However, despite being pretty new code, how do I find mod_tile? Pretty good, actually. I expected more difficulties setting it up, but overall the procedure hasn't been too bad. I like the approach of creating a module vs. using several middle-layers. So once again, hats off to the OSM crew.

ethX Issues with Xen and Ubuntu

Published on Sunday, April 20, 2008

My new guest VMs under Xen seem to be having issues where upon each reboot, the network interface gets incremented by 1. For instance, it starts at eth0, then goes to eth1, then eth2, and eventually ethX. There are two issues to fix: 1) get the count back to 0, and 2) stop it from counting again.

I was able to get them to decrease by looking in the /etc/udev/rules.d/70-persistent-net.rules file and removing all entries.

Next, I was able to prevent this by simply inserting a MAC address to the interface in the configuration. For instance, one of my domU's has this entry:

vif         = [ 'mac=00:D0:59:83:DC:B5,bridge=xenbr0' ]


Lastly, I made sure (as I would with any server) to create an entry in the /etc/network/interfaces file.

auto eth0
iface eth0 inet static
address 192.168.1.16
gateway 192.168.1.1
netmask 255.255.255.0


Works like a charm.

Installing Mapnik on Ubuntu 7.10

Published on Saturday, April 19, 2008

I have managed to install mapnik 0.4, 0.5, 0.5.1 and various SVN releases in-between on Ubuntu. While this isn't in itself exciting, I think I manage to stumble at every installation. I typically forget to add the flags when building, so, to prevent myself from stumbling again, I'm going to write them out here.

Build mapnik

$ python scons/scons.py PYTHON=/usr/bin/python \ 

PGSQL_INCLUDES=/usr/include/postgresql \

PGSQL_LIBS=/usr/lib/postgresql BOOST_INCLUDES=/usr/include/boost BOOST_LIBS=/usr/lib


Then install it
$ sudo python scons/scons.py install PYTHON=/usr/bin/python \ 

PGSQL_INCLUDES=/usr/include/postgresql \

PGSQL_LIBS=/usr/lib/postgresql BOOST_INCLUDES=/usr/include/boost BOOST_LIBS=/usr/lib


Then proceed as normal.

And Yet Another Remodel

Published on Wednesday, March 19, 2008

I have finally decided to do another remodel of this site. I had a few goals before starting:


  • Use one image

  • Use the YUI-CSS framework

  • Use Django

  • Make it easily extendable


So far, I think I've accomplished these goals. The site is easier to read, easy to modify, and has a few new features. More entries to come!

Database Woopsie

Published on Wednesday, February 13, 2008

I returned to my computer today to notice I had the following error:

(145, "Table './databasename/comments_freecomment' is marked as crashed and should be repaired")


Well, crap. The solution is quite easy, however:

mysqlcheck -uUsername -pPassword databasename comments_freecomment


Now you know what you already know, you can fix it:

mysqlcheck -r -uUsername -pPassword databasename comments_freecomment


If that doesn't work, you can try a slightly different method. First, go to the location where your databases are stored on the disk (most likely something like /var/lib/mysql/databasename). Next, stop the database -- and try to free up as much memory as possible. Then run:

myisamchk -r comments_freecomment


If that doesn't work, try to force it:

myisamchk -r comments_freecomment -f


Hope that helps!


GPS on the SkypePhone

Published on Sunday, February 3, 2008

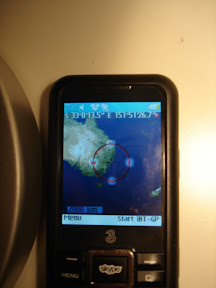
Yesterday I was sort of curious if I could use my 3 Skypephone in a pinch if I got lost, which here in Sydney, happens quite often. Luckily 3's Skypephone has both Bluetooth, and supports j2me apps. Mobile GPS unit, here I come.


The recipe to get maps on your Skypephone is pretty darn easy. You'll need one dash bluetooth GPS receiver (I have the Qstarz BT-Q1000), TrekBuddy, a TrekBuddy acceptable map (easily downloadable), and one dab computer -- but since you're reading this, I figure you've got that part taken care of.

My process is as follows (on Linux): plug in your Skypephone and select "usb storage" on your phone. Drag the TrekBuddy.jar file onto your new mounted drive (mine comes up as KINGSTON). Drag a relevent map downloaded from bandnet.org onto your phone as well. Unplug your phone from the USB, and it will scan for new media. Hit Menu -> My Stuff -> Others and scroll down to treckbuddy.jar -- hit Run. Go to your Connectivity settings and turn on bluetooth. Next go to Games and Apps and downloaded apps, start TrekBuddy. Press the key above MENU and select Load Map, and choose the map you uploaded to your phone. Now hit Start. Select the GPS device, and you're in business!

There are more instructions here and also here.

Size of Uncompressed OSM File

Published on Tuesday, January 8, 2008

I've been playing around with OSM a little lately, and have been meaning to construct my own slippy map. At first I wanted to do it on my VPS -- but with rather limited storage, and even more limited memory, there just isn't a way. Three problems exists: the first occurs when trying to use osm2pgsql to import the OSM file into the database. Current records state that this typically uses 650+ MB, something my 512MB VPS just doesn't have (although I'm writing some code that might make this possible in the future).

The second problem exists with CPU usage. Processes on my VPS don't really utilize the CPU much, which means renicing the process doesn't do a thing. The CPU pegs at 100%, as it is supposed to do, except that the VPS auto-kills processes that stay at 100% for any length of time. Luckily somebody wrote a program called "cpulimit" (apt-get install cpulimit) that will cap the CPU usage for a process.

The last problem that I thought about is what if I could uncompress the file. Would that use less memory to stick it in the database? I searched and searched but couldn't find an answer to how big the actual .osm file is. I ultimately broke down and decided to spend the 50c it would take to get this all done with EC2, and write some scripts to automate it in the future.

However, since I've finally uncompressed the .osm, I can tell you that as of about January 1st, 2008, the uncompressed OSM size is 67GB.

Using Distcc

Published on Tuesday, January 1, 2008

I'm in the process of working on one of my projects, and the requirement came up to download a fairly large file (4GB). Since I only receive ~20GB/month at my house, I decided to just use my server in the U.S. The next requirement came about needing to compile Mapnik, which I had intended to do on the server at some point anyways, yet I ran into memory constraints.

Good old distcc comes to the rescue. I don't need to use distcc that often, yet when I do, it is very handy. However, I always forget to set g++ to use distcc as well. So, for when I forget next time...

DISTCC_HOSTS='home'
./configure
make CC=distcc CXX=distcc


Maybe one of these days I'll write a more in depth tutorial for installing distcc, yet until then, you can peruse the notes I left on my VPS provider's wiki.